
Docs
Pixel Flow user manual and best practices
Find scanning, filtering, image details, library, export, account, and industry workflow guidance by task.
Back Up Pixel Flow Data Before Switching Computers, Reinstalling, or Uninstalling
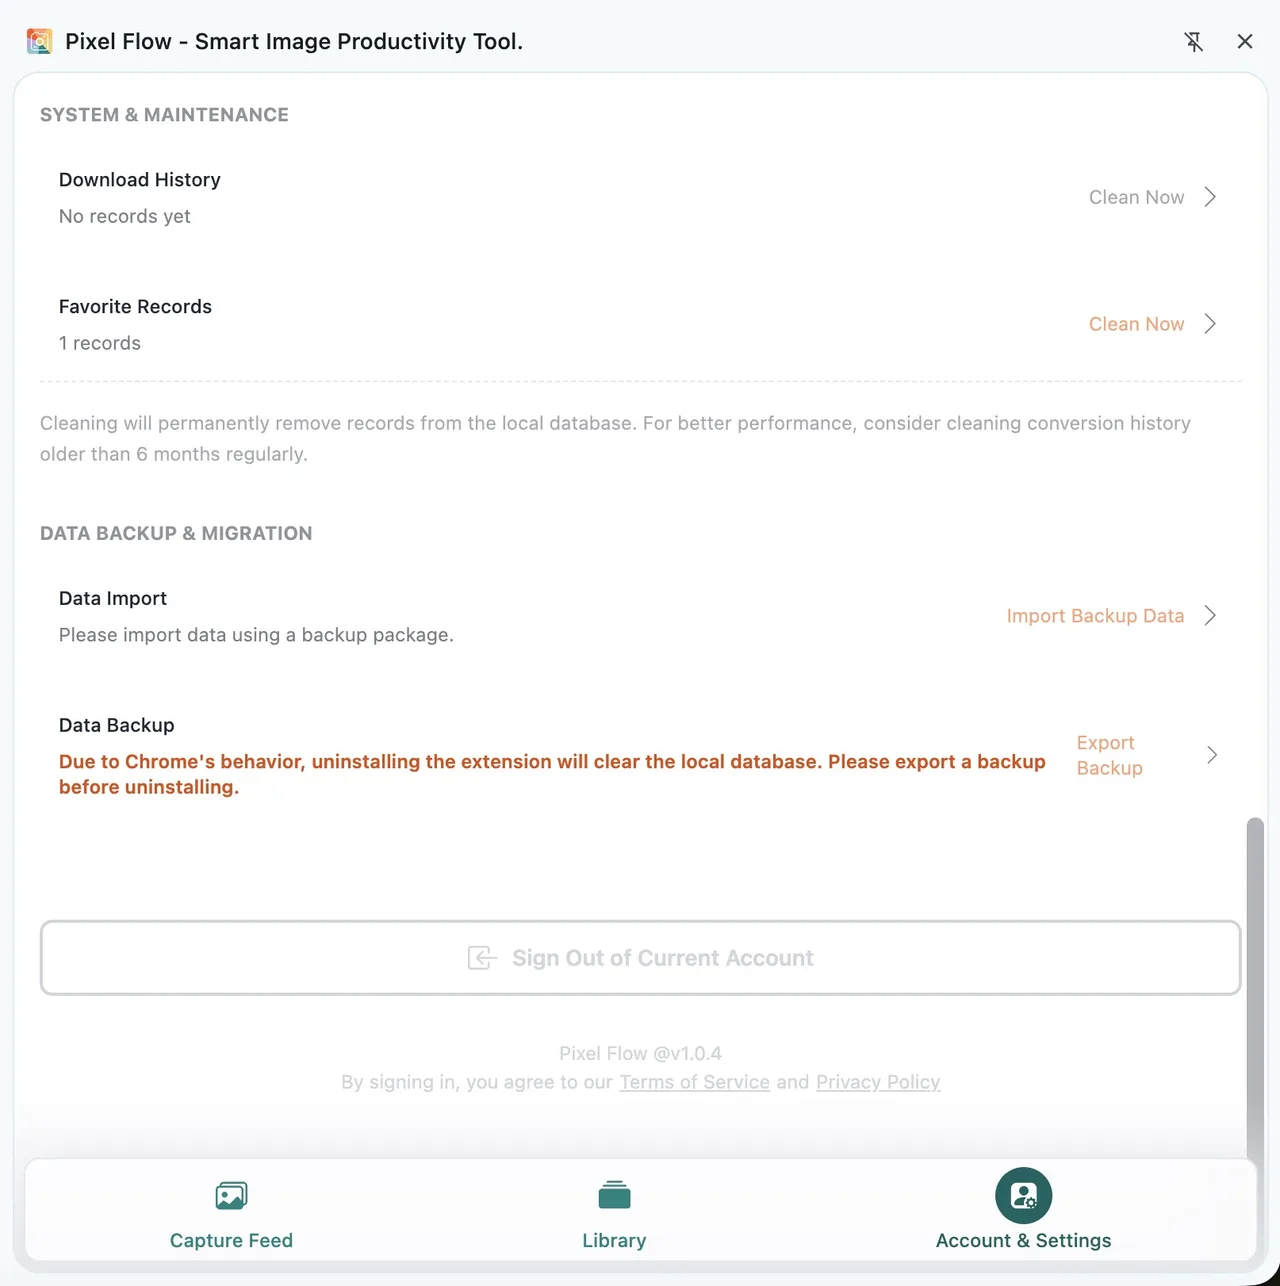
If you are preparing to switch computers, reinstall your browser, uninstall Pixel Flow, clear browser data, or use Pixel Flow on another device, do not change your original browser environment yet. Any of these actions can make the Pixel Flow data in that browser unavailable. The images you spent time collecting and filtering, the tags you organized, and the source records and download history you built up over time are difficult to recreate. Losing them would be frustrating and could mean starting over. Before making changes in your old browser environment, be sure to export a Pixel Flow data backup first.
When Pixel Flow was first designed, the author chose a privacy-first approach to data storage to reduce the privacy concerns that could arise if asset images, source records, and personal organization habits were automatically uploaded to and centrally stored on a remote server. Your library, favorite records, tags, download history, and common settings are therefore stored mainly in your current browser. The author believes this gives you more direct control over your work data. This design also has a tradeoff: if the browser’s or extension’s local data is cleared, it is difficult to recover. Even if you sign in to the same account in a new browser, the asset data from the original browser will not be restored through sync.
Therefore, to keep using Pixel Flow normally in a new browser environment, you must migrate your data. A migration usually has two steps: export a backup from the original browser, then import that backup into the new browser. Do not uninstall the extension, clear data, or stop using the original device until you have confirmed that the data in the new environment is complete and usable.
When You Should Back Up First
Export a current backup before any of the following actions:
| What you plan to do | What may happen without a backup |
|---|---|
| Switch computers or use another browser profile | The new browser will not automatically show your existing library, tags, or download history. |
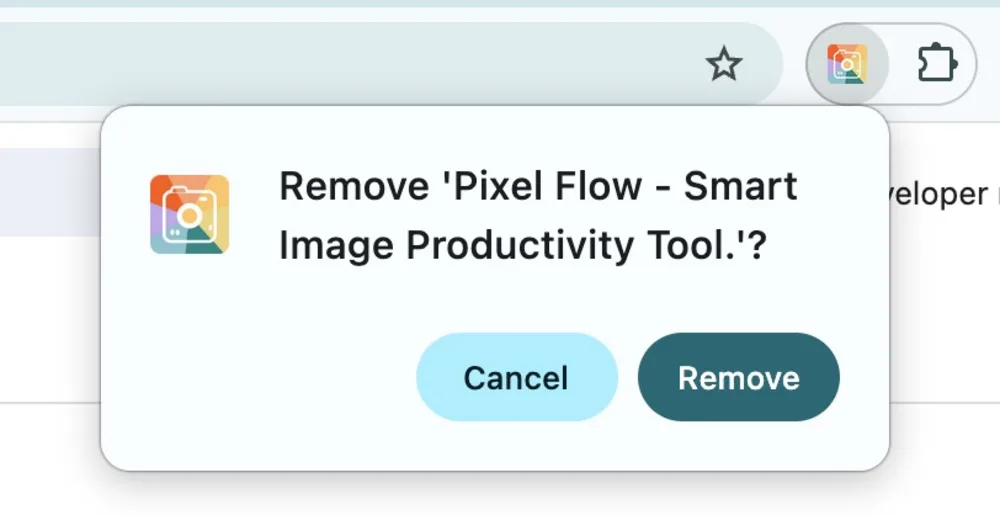
| Reinstall or reset the browser | Pixel Flow data stored in the original browser may be cleared. |
| Uninstall Pixel Flow | When the browser removes the extension, locally stored extension data may be deleted with it. |
| Clear browser or extension data | Favorite records, tags, download history, and settings may be affected. |
| Import a backup into an environment you already use | Back up the current environment first so you can compare the result after import. |
If you also want to learn how often to create routine backups, what happens when you clean favorite records or download history, and how to review the safety of your data, read the Pixel Flow Data Safety, Backup, and Cleanup Guide.
What Data a Backup Can Migrate
A backup package moves the work data you have built up in Pixel Flow, including:
- favorite records, image data, and source clues in your library;
- custom tags and the relationships between images and tags;
- download history;
- common preferences such as language, collection thresholds, file naming, format conversion, and export options.
Account details, PRO entitlements, and purchase records do not rely on the backup package for migration. When you sign in within the new browser environment, Pixel Flow recognizes your account information again.
Likewise, the following content is not restored through a backup package:
- the actual files in your computer’s Downloads folder;
- temporary previews, unfinished conversion tasks, and browser cache data;
- image license documents and other project delivery materials.
If a project involves client delivery, source tracing, or commercial use, keep the downloaded files, license documents, and project inventory separately. A backup package is not proof of image rights. See Use Pixel Flow Responsibly for related guidance.
The steps below cover the complete export and import workflow. If you only need a quick reference for the Settings entry point, button actions, and import rules, open Data Backup and Import Instructions.
Step 1: Export a Backup from the Original Browser
Complete the export while your Pixel Flow data is still available in the original browser:
- Open the Pixel Flow side panel.
- Go to Account and Settings.
- Find Data Backup and Migration.
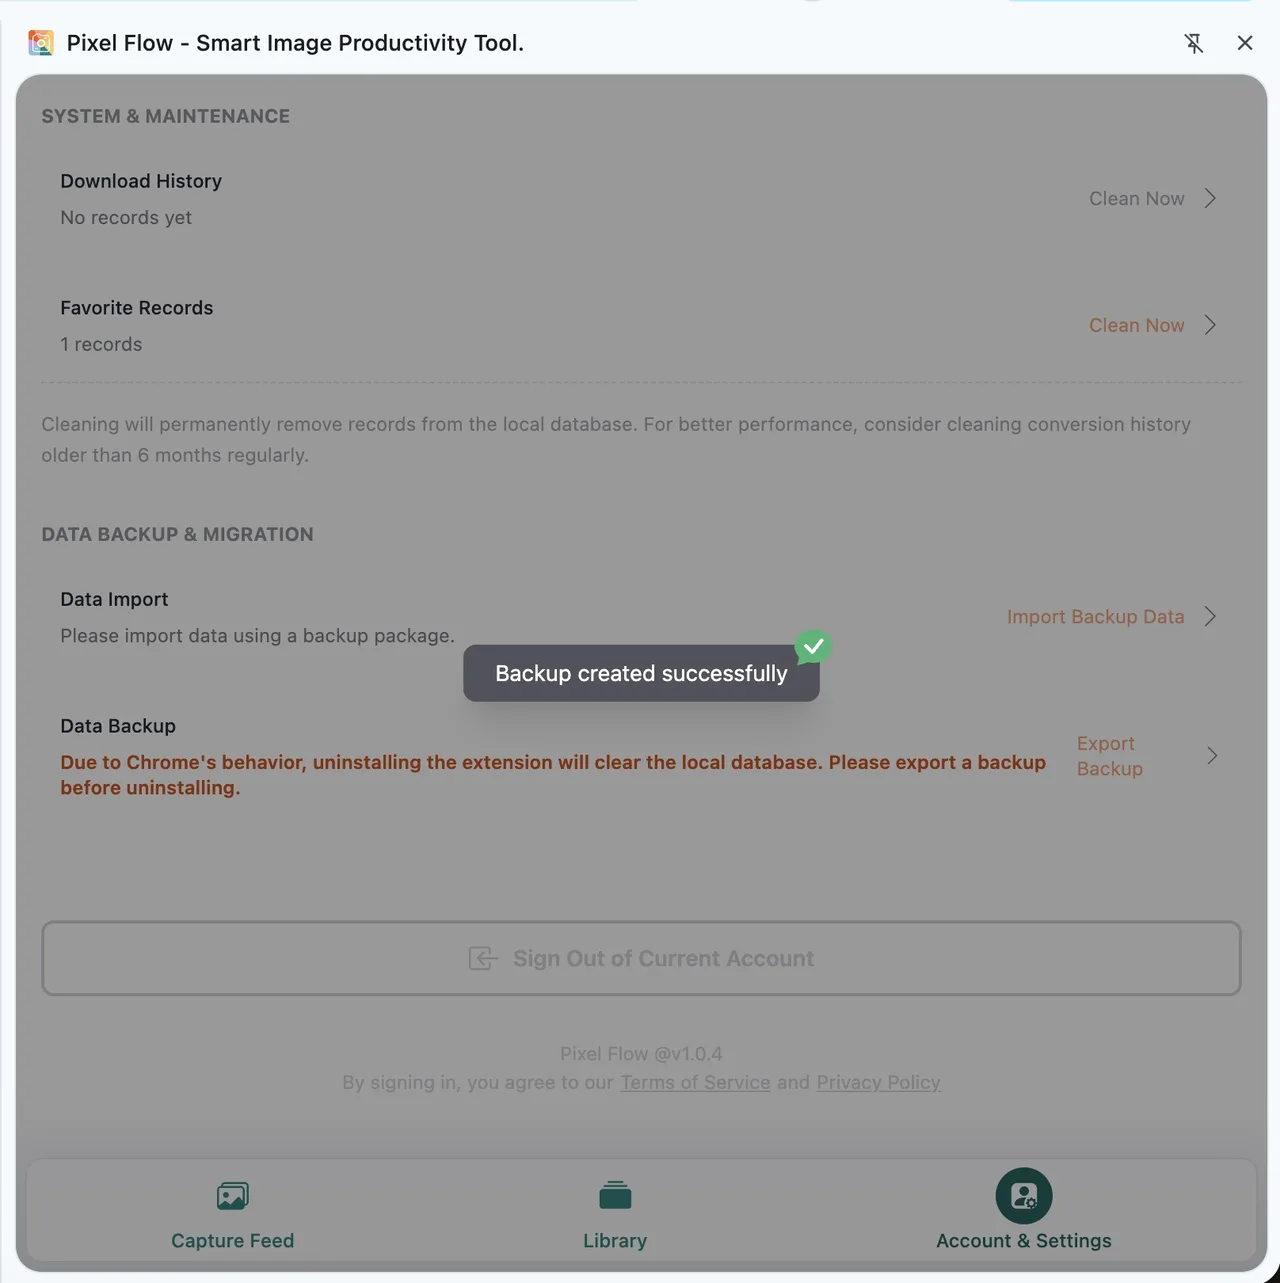
- Click Export Backup and wait for the browser to report that the backup was created successfully.
- Open the browser’s download folder and confirm that the
.zipbackup package has finished downloading. - Move the backup package somewhere that will not be affected by browser cleanup, such as a project folder, external drive, or trusted cloud drive.
A backup package may contain source links, tags, download records, and project-related information. Do not casually send it to people who do not need access. For important projects, archive backups by project name and backup date, and keep one copy locally and another in a trusted cloud drive.
Step 2: Import the Backup into the New Browser
After confirming that the backup package is safely stored, continue in the new browser you plan to use long term:
- Install and open Pixel Flow.
- Sign in with the same account used to export the backup.
- Go to Account and Settings → Data Backup and Migration.
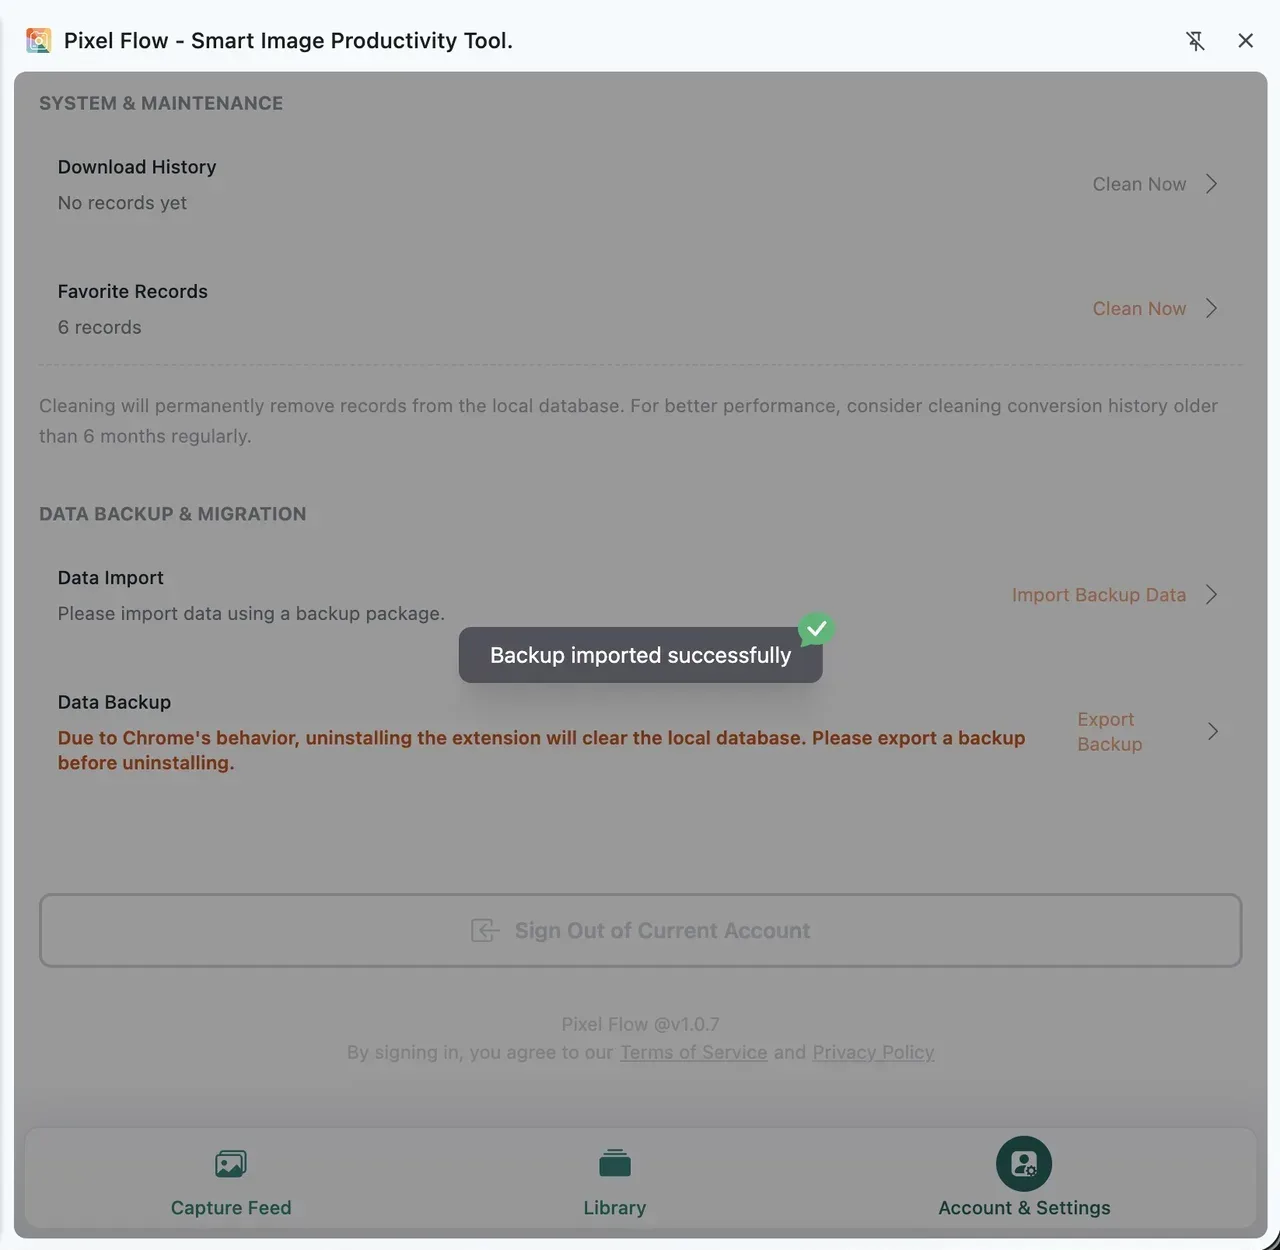
- Click Import Backup Data.
- Select the
.zipbackup package you exported, then click Confirm Import. - Keep the side panel open and wait for the import to finish.
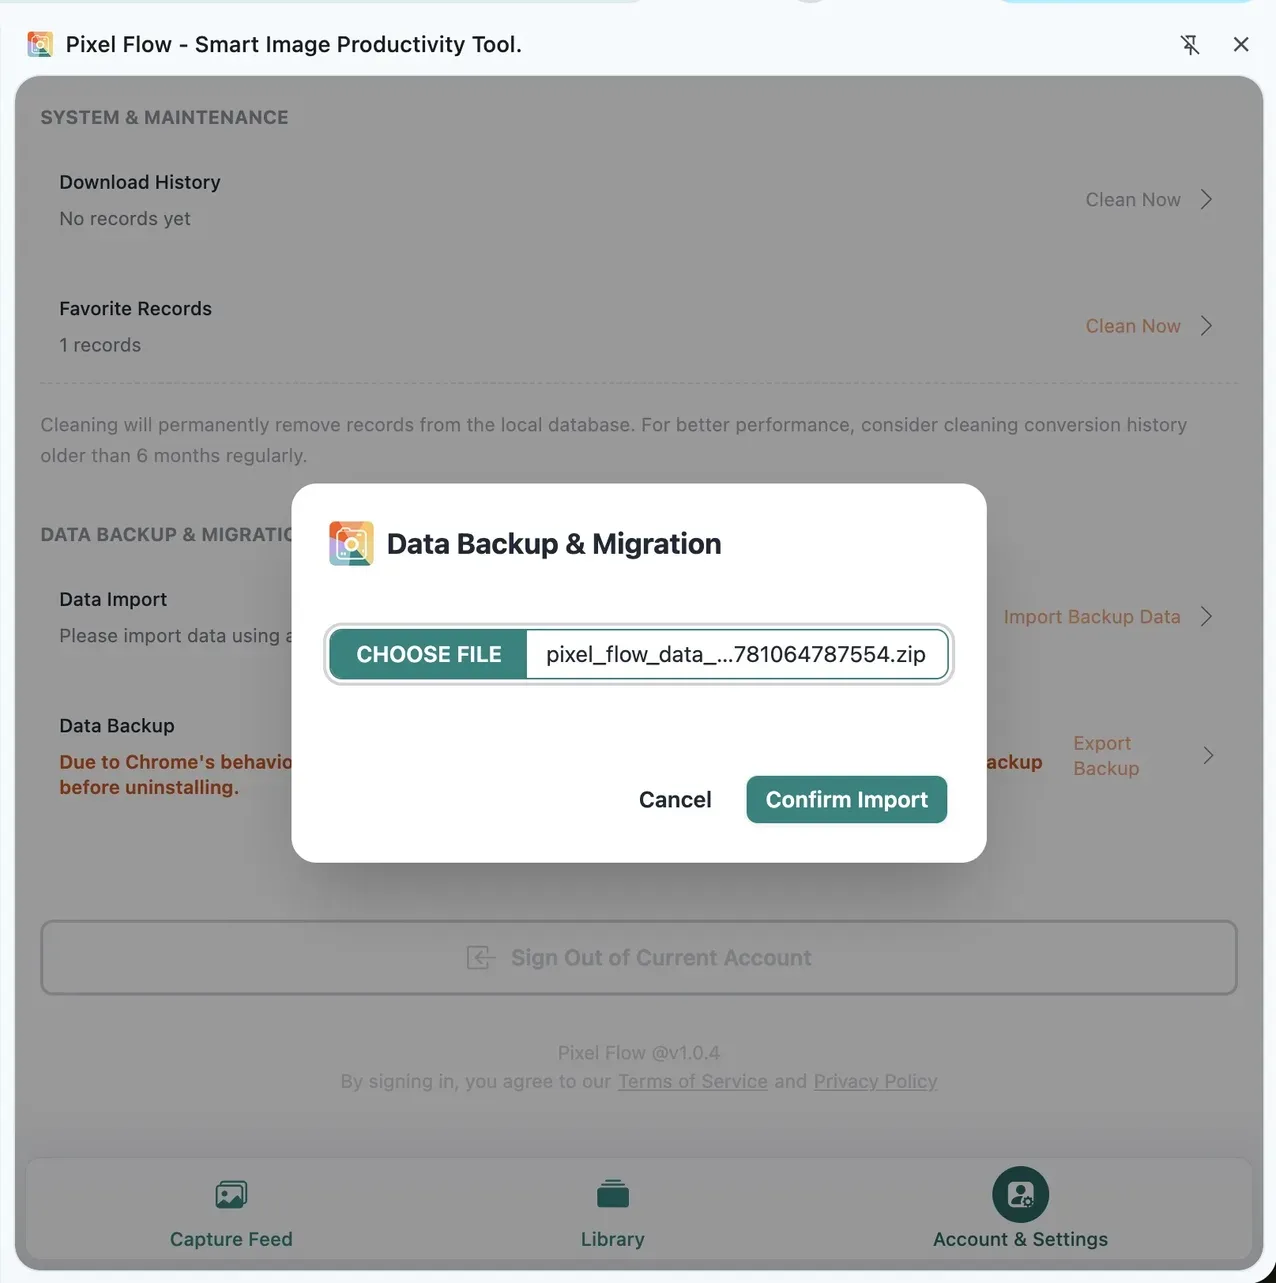
Import uses a merge process and does not clear the data already in the new browser first. Pixel Flow handles duplicate favorites, download records, and tags with the same name before adding eligible backup content to the current environment. If the new browser already contains important data, export a separate backup of that environment before importing. To learn how duplicates, tags, and account quotas are handled, see the backup data import rules.
Step 3: Verify the Migration
When you see the import success message, do not clear the original browser immediately. Check the following first:
- Confirm that important project images appear in the library.
- Confirm that your common tags are available and that tag filters find the expected images.
- Check that important records remain in download history.
- Review file naming, format conversion, and export preferences to make sure they match your previous workflow.
- Confirm that the correct account is signed in and that the PRO status is correct.
Why Some Content Was Not Imported
Import results depend on the current account quota and the condition of the backup file:
| What you see | Cause and what to do |
|---|---|
| The backup does not belong to the current account | The signed-in account is different from the account used to export the backup. Switch to the original account and import again. |
| Some favorites are missing | The Free plan keeps up to 60 favorite images. Duplicate or invalid records may also be skipped. Check whether the same images already exist in the library and verify your account entitlement. |
| Some tags are missing | The Free plan keeps up to 6 custom tags and PRO keeps up to 60. Tags with the same name may have been merged. Check the existing list in Image Tag Management. |
| The file cannot be selected or imported | The file may not be a .zip backup exported by Pixel Flow, or it may be damaged. Return to the original browser and export a new backup. |
| The file is too large | The current maximum backup import size is 500MB. Contact support and include the backup size and your use case. |
| Import was interrupted | The side panel may have been closed or the environment refreshed during import. Reopen the side panel and import again. |
PRO accounts have a higher favorite allowance and support up to 60 custom tags. If the original library contains a large amount of data, confirm that the same account is signed in within the new browser and that PRO status appears correctly. See Free vs Pro and View PRO Status and Records for current entitlement details.
If the import still does not complete, use Contact Support and include the browser version, Pixel Flow version, a screenshot of the failure message, the backup package size, and whether the same account was used for export and import. Do not publicly upload a backup package that contains project information.
Technical Background (Optional)
You do not need to understand the technical details below to complete a backup and migration. Remember only this: export a backup while the original browser still works, and do not clear the original environment until you have verified that the new browser contains complete data.
Pixel Flow uses browser-local storage primarily because of its focus on user privacy. The images you favorite, source records, tags, and download history may contain unpublished project information or reveal personal organization habits. Keeping this work data mainly in the current browser reduces automatic uploads to remote servers and centralized storage under an account, while giving you more direct control over where the data is kept.
This design also means that signing in mainly identifies your account and entitlements; it does not automatically sync the asset data from the original browser to another device. When you switch computers, reinstall a browser, or uninstall the extension, you need to migrate that data through a backup package. In other words, reducing remote storage also makes it important to complete a backup before clearing the original browser.
If you are interested in the implementation, Pixel Flow uses local storage capabilities provided by the browser. This is a common way for browser extensions and web applications to store structured data. Chrome’s technical documentation explains that extension data stored locally remains on the current device and may be cleared when the extension is removed. IndexedDB is a browser standard for storing structured data.
For more technical detail, see Chrome’s Storage API documentation and MDN’s IndexedDB API documentation.